Download Dell PowerEdge Operate 2023.D-PE-OE-23.VCEplus.2025-02-27.34q.vcex
| Vendor: | Dell |
| Exam Code: | D-PE-OE-23 |
| Exam Name: | Dell PowerEdge Operate 2023 |
| Date: | Feb 27, 2025 |
| File Size: | 559 KB |
How to open VCEX files?
Files with VCEX extension can be opened by ProfExam Simulator.
Discount: 20%

Demo Questions
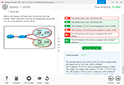
Question 1
Which configuration settings are installed when using Easy Restore?
- BIOS, iDRAC, and NIC
- Virtual console, network, and SCP
- IDRAC, BOSS, and partitions
- Asset tag, passwords, and RAID
Correct answer: A
Explanation:
Understanding Easy Restore FunctionalityServer Troubleshooting (32%)Explain Easy Restore, diagnostic utilities, and hardware diagnostic optionsWhat is Easy Restore?Easy Restore is a feature in Dell PowerEdge servers that simplifies the process of restoring system configuration settings after replacing the system board (motherboard).Purpose:Reduces downtime by automatically restoring critical configuration settings. Eliminates the need to manually reconfigure settings after hardware replacement.Configuration Settings Restored by Easy RestoreBIOS Settings:Restores all BIOS configurations, including boot order, system settings, and performance options.iDRAC Settings:Restores Integrated Dell Remote Access Controller (iDRAC) configurations, such as network settings, user accounts, and management preferences.NIC (Network Interface Card) Settings:Restores network configurations for onboard NICs, including IP addresses, VLAN settings, and teaming configurations.Explanation of OptionsOption A: 'BIOS, iDRAC, and NIC'Analysis:Accurately reflects the settings restored by Easy Restore.BIOS: System configuration and hardware settings.iDRAC: Remote management settings.NIC: Network configurations.Conclusion: Correct Answer.Option B: 'Virtual console, network, and SCP'Analysis:Virtual Console: Part of iDRAC features but not a configuration setting restored separately.SCP (Server Configuration Profile): Used for exporting/importing configurations but not directly restored by Easy Restore.Conclusion: Inaccurate.Option C: 'iDRAC, BOSS, and partitions'Analysis:BOSS (Boot Optimized Storage Solution): A storage controller for boot drives; its settings are not restored by Easy Restore.Partitions: Disk partitions are not restored by Easy Restore.Conclusion: Incorrect.Option D: 'Asset tag, passwords, and RAID'Analysis:Asset Tag: Restored by Easy Restore.Passwords: May or may not be restored, depending on security policies.RAID Configuration: Not restored by Easy Restore; requires separate backup and restoration procedures.Conclusion: Partially correct but not the best answer.Dell Operate ReferenceServer Troubleshooting (32%)Explain Easy Restore, diagnostic utilities, and hardware diagnostic options: Understanding what configurations Easy Restore handles is essential for efficient troubleshooting and system recovery.Server Components (26%)Define the different processor, memory options, and memory configurations: Knowing how system configurations are managed and restored.ConclusionEasy Restore reinstalls configuration settings for the BIOS, iDRAC, and NIC. This feature ensures that critical system configurations are preserved after replacing the system board, minimizing downtime and administrative effort. Understanding Easy Restore Functionality
Server Troubleshooting (32%)
Explain Easy Restore, diagnostic utilities, and hardware diagnostic options
What is Easy Restore?
Easy Restore is a feature in Dell PowerEdge servers that simplifies the process of restoring system configuration settings after replacing the system board (motherboard).
Purpose:
Reduces downtime by automatically restoring critical configuration settings.
Eliminates the need to manually reconfigure settings after hardware replacement.
Configuration Settings Restored by Easy Restore
BIOS Settings:
Restores all BIOS configurations, including boot order, system settings, and performance options.
iDRAC Settings:
Restores Integrated Dell Remote Access Controller (iDRAC) configurations, such as network settings, user accounts, and management preferences.
NIC (Network Interface Card) Settings:
Restores network configurations for onboard NICs, including IP addresses, VLAN settings, and teaming configurations.
Explanation of Options
Option A: 'BIOS, iDRAC, and NIC'
Analysis:
Accurately reflects the settings restored by Easy Restore.
BIOS: System configuration and hardware settings.
iDRAC: Remote management settings.
NIC: Network configurations.
Conclusion: Correct Answer.
Option B: 'Virtual console, network, and SCP'
Analysis:
Virtual Console: Part of iDRAC features but not a configuration setting restored separately.
SCP (Server Configuration Profile): Used for exporting/importing configurations but not directly restored by Easy Restore.
Conclusion: Inaccurate.
Option C: 'iDRAC, BOSS, and partitions'
Analysis:
BOSS (Boot Optimized Storage Solution): A storage controller for boot drives; its settings are not restored by Easy Restore.
Partitions: Disk partitions are not restored by Easy Restore.
Conclusion: Incorrect.
Option D: 'Asset tag, passwords, and RAID'
Analysis:
Asset Tag: Restored by Easy Restore.
Passwords: May or may not be restored, depending on security policies.
RAID Configuration: Not restored by Easy Restore; requires separate backup and restoration procedures.
Conclusion: Partially correct but not the best answer.
Dell Operate Reference
Server Troubleshooting (32%)
Explain Easy Restore, diagnostic utilities, and hardware diagnostic options: Understanding what configurations Easy Restore handles is essential for efficient troubleshooting and system recovery.
Server Components (26%)
Define the different processor, memory options, and memory configurations: Knowing how system configurations are managed and restored.
Conclusion
Easy Restore reinstalls configuration settings for the BIOS, iDRAC, and NIC. This feature ensures that critical system configurations are preserved after replacing the system board, minimizing downtime and administrative effort.
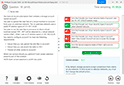
Question 2
The customer implemented ten Dell PowerEdge R660 servers in their data center. The environment also has two MX7000 chassis. The system administrator requires a management application that can help holistically manage and monitor the storage, server, and network environment.
What would be the recommended solution?
- iSM
- OME
- Group Manager
- OMSA
Correct answer: B
Explanation:
Selecting a Management Application for Holistic Management of Dell PowerEdge Servers and MX7000 ChassisServer Management and Configuration Tools (14%)Explain the management interface options - LCC, racadm, OMSA, iSM, OMESystem Administration (18%)Configure BIOS, Storage, virtual media, networking, user access, lockdown mode, and group managementUnderstanding Customer RequirementsEnvironment:Ten Dell PowerEdge R660 servers (rack servers).Two MX7000 chassis (modular servers).Requirement:A management application that can holistically manage and monitor storage, servers, and network environment.Evaluation of OptionsOption A: iSM (Integrated Dell Remote Access Controller Service Module)iSM is a software module that enhances iDRAC functionality by providing OS-level monitoring and management.It is installed on individual servers to facilitate communication between the OS and iDRAC.Limitation:Not a centralized management application.Does not provide holistic management across multiple servers and chassis.Conclusion: Not suitable.Option B: OME (OpenManage Enterprise)Dell OpenManage Enterprise is a web-based, one-to-many systems management application.Features:Provides comprehensive management of Dell EMC servers, storage, and networking devices.Supports both rack servers (R660) and modular chassis (MX7000).Offers monitoring, configuration, deployment, and update capabilities.User-friendly dashboard for holistic infrastructure management.Conclusion: Correct Answer.Option C: Group ManagerGroup Manager is an iDRAC feature that allows basic grouping of servers for simplified management.Limitations:Limited to servers of the same generation and similar configurations.Does not support the full range of management functions required.Not suitable for managing storage and network environments.Conclusion: Not sufficient.Option D: OMSA (OpenManage Server Administrator)OMSA is a software agent that provides a comprehensive, one-to-one systems management solution.Installed on individual servers to manage and monitor hardware components.Limitations:Does not provide a centralized, holistic view.Lacks the ability to manage multiple servers and chassis collectively.Conclusion: Not appropriate.Dell Operate ReferenceServer Management and Configuration Tools (14%)Explain the management interface options - LCC, racadm, OMSA, iSM, OME: Understanding the capabilities and limitations of various management tools is essential for selecting the appropriate solution.System Administration (18%) Group management: OpenManage Enterprise facilitates group management of diverse hardware.ConclusionOpenManage Enterprise (OME) is the recommended solution. It provides a unified management console capable of holistically managing and monitoring the customer's storage, server, and network environment, including both rack servers and modular chassis. Selecting a Management Application for Holistic Management of Dell PowerEdge Servers and MX7000 Chassis
Server Management and Configuration Tools (14%)
Explain the management interface options - LCC, racadm, OMSA, iSM, OME
System Administration (18%)
Configure BIOS, Storage, virtual media, networking, user access, lockdown mode, and group management
Understanding Customer Requirements
Environment:
Ten Dell PowerEdge R660 servers (rack servers).
Two MX7000 chassis (modular servers).
Requirement:
A management application that can holistically manage and monitor storage, servers, and network environment.
Evaluation of Options
Option A: iSM (Integrated Dell Remote Access Controller Service Module)
iSM is a software module that enhances iDRAC functionality by providing OS-level monitoring and management.
It is installed on individual servers to facilitate communication between the OS and iDRAC.
Limitation:
Not a centralized management application.
Does not provide holistic management across multiple servers and chassis.
Conclusion: Not suitable.
Option B: OME (OpenManage Enterprise)
Dell OpenManage Enterprise is a web-based, one-to-many systems management application.
Features:
Provides comprehensive management of Dell EMC servers, storage, and networking devices.
Supports both rack servers (R660) and modular chassis (MX7000).
Offers monitoring, configuration, deployment, and update capabilities.
User-friendly dashboard for holistic infrastructure management.
Conclusion: Correct Answer.
Option C: Group Manager
Group Manager is an iDRAC feature that allows basic grouping of servers for simplified management.
Limitations:
Limited to servers of the same generation and similar configurations.
Does not support the full range of management functions required.
Not suitable for managing storage and network environments.
Conclusion: Not sufficient.
Option D: OMSA (OpenManage Server Administrator)
OMSA is a software agent that provides a comprehensive, one-to-one systems management solution.
Installed on individual servers to manage and monitor hardware components.
Limitations:
Does not provide a centralized, holistic view.
Lacks the ability to manage multiple servers and chassis collectively.
Conclusion: Not appropriate.
Dell Operate Reference
Server Management and Configuration Tools (14%)
Explain the management interface options - LCC, racadm, OMSA, iSM, OME: Understanding the capabilities and limitations of various management tools is essential for selecting the appropriate solution.
System Administration (18%)
Group management: OpenManage Enterprise facilitates group management of diverse hardware.
Conclusion
OpenManage Enterprise (OME) is the recommended solution. It provides a unified management console capable of holistically managing and monitoring the customer's storage, server, and network environment, including both rack servers and modular chassis.
Question 3
The Dell PowerEdge server uses SEDs. The server is being repurposed for a new solution, and the data on the drives must be permanently deleted.
How can this be accomplished?
- Remove RAID configuration
- NVRAM Clear
- Format and Reinstall
- Secure Erase
Correct answer: D
Explanation:
Permanently Deleting Data on Self-Encrypting Drives (SEDs) in a Dell PowerEdge ServerServer Components (26%)Define storage options, Drives, PERC, IDSDM, and BOSSAnalyze server security featuresUnderstanding Self-Encrypting Drives (SEDs)SEDs are hard drives or SSDs that automatically encrypt all data written to them using a built-in encryption engine.Benefits:Enhanced data security.Protection of data at rest.Simplified disposal or repurposing processes through secure key management.Methods to Permanently Delete Data on SEDsSecure Erase:Secure Erase is a process that performs a cryptographic erase by deleting the encryption keys stored within the drive.Once the encryption key is erased, all data on the drive becomes unrecoverable, as it cannot be decrypted.Advantages:Fast and efficient method to render data inaccessible.Complies with data sanitization standards and regulations.Implementation:Can be initiated via the drive's firmware commands.Dell provides tools within the iDRAC or BIOS to perform Secure Erase operations on SEDs.Explanation of OptionsOption A: Remove RAID configurationDeleting the RAID configuration removes the logical drive mappings but does not erase the actual data stored on the physical drives.Data can potentially be recovered using data recovery tools.Conclusion: Does not securely delete data.Option B: NVRAM ClearClearing NVRAM resets BIOS settings to default.Does not affect data stored on drives.Conclusion: Ineffective for deleting drive data.Option C: Format and ReinstallFormatting the drives and reinstalling the operating system overwrites some data areas.Does not guarantee that all data is overwritten. Data recovery techniques can potentially retrieve residual data.Conclusion: Not a secure method for data deletion on SEDs.Option D: Secure ErasePerforms a cryptographic erase by deleting the encryption keys.Ensures that data cannot be recovered.Conclusion: Correct Answer.Dell Operate ReferenceServer Components (26%)Define storage options, Drives: Understanding the types of drives used and their management.Analyze server security features: Knowledge of data protection and sanitization methods is crucial for maintaining data security.Server Troubleshooting (32%)Explain Configuration Validation, crash capture, and minimum to POST: While not directly related, understanding system configurations assists in performing operations like Secure Erase.ConclusionTo permanently delete data on SEDs in a Dell PowerEdge server, Secure Erase should be performed. This method ensures that the encryption keys are destroyed, rendering all data on the drives inaccessible and irrecoverable. Permanently Deleting Data on Self-Encrypting Drives (SEDs) in a Dell PowerEdge Server
Server Components (26%)
Define storage options, Drives, PERC, IDSDM, and BOSS
Analyze server security features
Understanding Self-Encrypting Drives (SEDs)
SEDs are hard drives or SSDs that automatically encrypt all data written to them using a built-in encryption engine.
Benefits:
Enhanced data security.
Protection of data at rest.
Simplified disposal or repurposing processes through secure key management.
Methods to Permanently Delete Data on SEDs
Secure Erase:
Secure Erase is a process that performs a cryptographic erase by deleting the encryption keys stored within the drive.
Once the encryption key is erased, all data on the drive becomes unrecoverable, as it cannot be decrypted.
Advantages:
Fast and efficient method to render data inaccessible.
Complies with data sanitization standards and regulations.
Implementation:
Can be initiated via the drive's firmware commands.
Dell provides tools within the iDRAC or BIOS to perform Secure Erase operations on SEDs.
Explanation of Options
Option A: Remove RAID configuration
Deleting the RAID configuration removes the logical drive mappings but does not erase the actual data stored on the physical drives.
Data can potentially be recovered using data recovery tools.
Conclusion: Does not securely delete data.
Option B: NVRAM Clear
Clearing NVRAM resets BIOS settings to default.
Does not affect data stored on drives.
Conclusion: Ineffective for deleting drive data.
Option C: Format and Reinstall
Formatting the drives and reinstalling the operating system overwrites some data areas.
Does not guarantee that all data is overwritten.
Data recovery techniques can potentially retrieve residual data.
Conclusion: Not a secure method for data deletion on SEDs.
Option D: Secure Erase
Performs a cryptographic erase by deleting the encryption keys.
Ensures that data cannot be recovered.
Conclusion: Correct Answer.
Dell Operate Reference
Server Components (26%)
Define storage options, Drives: Understanding the types of drives used and their management.
Analyze server security features: Knowledge of data protection and sanitization methods is crucial for maintaining data security.
Server Troubleshooting (32%)
Explain Configuration Validation, crash capture, and minimum to POST: While not directly related, understanding system configurations assists in performing operations like Secure Erase.
Conclusion
To permanently delete data on SEDs in a Dell PowerEdge server, Secure Erase should be performed. This method ensures that the encryption keys are destroyed, rendering all data on the drives inaccessible and irrecoverable.
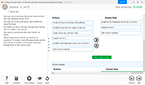
Question 4
SIMULATION
Using the iDRAC UI, generate and save locally a SupportAssist collection with system information and debug logs only.

- See the Explanation for Step by Step solution
Correct answer: A
Explanation:
To generate and save a SupportAssist collection with system information and debug logs only in the iDRAC UI, follow these steps:Step-by-Step Guide:Access SupportAssist in iDRAC:In the iDRAC interface, navigate to the Maintenance tab in the top menu.From the dropdown, select SupportAssist. This will bring up the SupportAssist options.Initiate a Collection:In the SupportAssist section, look for the option to Create a New Collection or Start a Collection.Choose Collect System Data or Generate a Collection, depending on the version of iDRAC.Select Collection Components:When prompted to select components for the collection, check the boxes for System Information and Debug Logs only.Ensure no other components are selected to limit the collection to just the required data.Start the Collection:Confirm your selection, then click Start or Generate. This will initiate the process to gather the specified data from the system.Save the Collection Locally:Once the collection is complete, you should see an option to Download or Save the file.Click the download link and save the collection file locally on your computer.Verify the Collection File:Check the downloaded file to ensure it contains only the system information and debug logs. It should be in a format such as ZIP or TAR, depending on the system configuration.By following these steps, you can successfully generate a SupportAssist collection with just the system information and debug logs and save it to your local system for further review or support purposes. To generate and save a SupportAssist collection with system information and debug logs only in the iDRAC UI, follow these steps:
Step-by-Step Guide:
Access SupportAssist in iDRAC:
In the iDRAC interface, navigate to the Maintenance tab in the top menu.
From the dropdown, select SupportAssist. This will bring up the SupportAssist options.
Initiate a Collection:
In the SupportAssist section, look for the option to Create a New Collection or Start a Collection.
Choose Collect System Data or Generate a Collection, depending on the version of iDRAC.
Select Collection Components:
When prompted to select components for the collection, check the boxes for System Information and Debug Logs only.
Ensure no other components are selected to limit the collection to just the required data.
Start the Collection:
Confirm your selection, then click Start or Generate. This will initiate the process to gather the specified data from the system.
Save the Collection Locally:
Once the collection is complete, you should see an option to Download or Save the file.
Click the download link and save the collection file locally on your computer.
Verify the Collection File:
Check the downloaded file to ensure it contains only the system information and debug logs. It should be in a format such as ZIP or TAR, depending on the system configuration.
By following these steps, you can successfully generate a SupportAssist collection with just the system information and debug logs and save it to your local system for further review or support purposes.
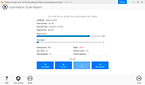
Question 5
SIMULATION
A customer has relocated one of their Dell PowerEdge platform servers from their main data center to a remote edge location, which uses a different network segment.
Reconfigure the iDRAC network settings with the following information:
- IP Address (CIDR): 192.168.0.120 (/24)
- Gateway: 192.168.0.1
- DNS Server 1: 10.10.0.1
- DNS Server 2: 10.10.0.2
- See the Explanation for Step by Step solution
Correct answer: A
Explanation:
To reconfigure the iDRAC network settings with a new IP address, gateway, and DNS servers, follow these steps in the iDRAC interface:Step-by-Step Guide:Access iDRAC Network Settings:Log into the iDRAC interface.Go to the iDRAC Settings tab in the top menu.Select Network from the dropdown options. This will open the network configuration page.Change IP Address and Subnet Mask:In the Network settings, locate the section for IPv4 Settings.Set the IP Address to 192.168.0.120.For the Subnet Mask, since it's a /24 CIDR, set it to 255.255.255.0.Configure the Gateway:In the same section, find the field for Default Gateway.Enter the Gateway as 192.168.0.1.Update DNS Server Information:Scroll down to the DNS Server settings.Enter DNS Server 1 as 10.10.0.1.Enter DNS Server 2 as 10.10.0.2.Apply the Settings:After entering all the new network information, click on Apply or Save to confirm the changes.The iDRAC interface may prompt for a restart to apply network changes. Follow any prompts as needed.Verify the Configuration:After applying the changes, check that the iDRAC is accessible at the new IP address 192.168.0.120.Confirm that the gateway and DNS settings are properly configured by testing connectivity or accessing the iDRAC from a device within the same network segment. By completing these steps, you will have reconfigured the iDRAC network settings for the new network segment, allowing remote management of the Dell PowerEdge server at the edge location. To reconfigure the iDRAC network settings with a new IP address, gateway, and DNS servers, follow these steps in the iDRAC interface:
Step-by-Step Guide:
Access iDRAC Network Settings:
Log into the iDRAC interface.
Go to the iDRAC Settings tab in the top menu.
Select Network from the dropdown options. This will open the network configuration page.
Change IP Address and Subnet Mask:
In the Network settings, locate the section for IPv4 Settings.
Set the IP Address to 192.168.0.120.
For the Subnet Mask, since it's a /24 CIDR, set it to 255.255.255.0.
Configure the Gateway:
In the same section, find the field for Default Gateway.
Enter the Gateway as 192.168.0.1.
Update DNS Server Information:
Scroll down to the DNS Server settings.
Enter DNS Server 1 as 10.10.0.1.
Enter DNS Server 2 as 10.10.0.2.
Apply the Settings:
After entering all the new network information, click on Apply or Save to confirm the changes.
The iDRAC interface may prompt for a restart to apply network changes. Follow any prompts as needed.
Verify the Configuration:
After applying the changes, check that the iDRAC is accessible at the new IP address 192.168.0.120.
Confirm that the gateway and DNS settings are properly configured by testing connectivity or accessing the iDRAC from a device within the same network segment.
By completing these steps, you will have reconfigured the iDRAC network settings for the new network segment, allowing remote management of the Dell PowerEdge server at the edge location.
Question 6
Exhibit.

A customer notices that an indicator on the left control panel of the PowerEdge Server has turned solid amber.
What does this indicate?
- PCIe card is present.
- PCIe card performing a firmware update.
- PCIe card temperature is normal.
- PCIe card experiences an error.
Correct answer: D
Explanation:
Dell PowerEdge servers are equipped with various LED indicators on the left control panel to provide immediate visual feedback about the server's status and component health. These indicators help in quickly identifying and troubleshooting issues without needing to access the system logs immediately.Analyzing the Visual Indicators (Server Troubleshooting - 32%)As per the 'Server Troubleshooting' section, one of the key skills is to 'Analyze the visual indicators on server components - system ID, PSU, and BLINK.'Color Codes and Their MeaningsSolid Green Light: Indicates normal operation.Blinking Green Light: Indicates activity (such as data transfer).Solid Amber Light: Indicates a fault or error condition.Blinking Amber Light: Indicates a critical error or failure.Application to the PCIe Card IndicatorIn this scenario, the customer notices that an indicator on the left control panel has turned solid amber. Specifically, this indicator is associated with the PCIe card.Option A: 'PCIe card is present.'Presence is usually indicated by a solid green light, not amber.Option B: 'PCIe card performing a firmware update.'Firmware updates are often indicated by blinking lights but typically not solid amber.Option C: 'PCIe card temperature is normal.'Normal temperature conditions would not trigger an amber light; instead, they would maintain a solid green light.Option D: 'PCIe card experiences an error.'A solid amber light directly correlates with an error condition in the component.ConclusionGiven the meaning of the solid amber indicator and its association with error conditions in Dell PowerEdge servers, the correct interpretation is that the PCIe card is experiencing an error.Dell Operate ReferenceServer Components (26%): Understanding server components like PCIe cards is crucial.Server Troubleshooting (32%): Analyzing visual indicators is a key troubleshooting step.Analyze the visual indicators on server components: Knowing the significance of LED colors aids in swift problem identification. Dell PowerEdge servers are equipped with various LED indicators on the left control panel to provide immediate visual feedback about the server's status and component health. These indicators help in quickly identifying and troubleshooting issues without needing to access the system logs immediately.
Analyzing the Visual Indicators (Server Troubleshooting - 32%)
As per the 'Server Troubleshooting' section, one of the key skills is to 'Analyze the visual indicators on server components - system ID, PSU, and BLINK.'
Color Codes and Their Meanings
Solid Green Light: Indicates normal operation.
Blinking Green Light: Indicates activity (such as data transfer).
Solid Amber Light: Indicates a fault or error condition.
Blinking Amber Light: Indicates a critical error or failure.
Application to the PCIe Card Indicator
In this scenario, the customer notices that an indicator on the left control panel has turned solid amber. Specifically, this indicator is associated with the PCIe card.
Option A: 'PCIe card is present.'
Presence is usually indicated by a solid green light, not amber.
Option B: 'PCIe card performing a firmware update.'
Firmware updates are often indicated by blinking lights but typically not solid amber.
Option C: 'PCIe card temperature is normal.'
Normal temperature conditions would not trigger an amber light; instead, they would maintain a solid green light.
Option D: 'PCIe card experiences an error.'
A solid amber light directly correlates with an error condition in the component.
Conclusion
Given the meaning of the solid amber indicator and its association with error conditions in Dell PowerEdge servers, the correct interpretation is that the PCIe card is experiencing an error.
Dell Operate Reference
Server Components (26%): Understanding server components like PCIe cards is crucial.
Server Troubleshooting (32%): Analyzing visual indicators is a key troubleshooting step.
Analyze the visual indicators on server components: Knowing the significance of LED colors aids in swift problem identification.
Question 7
What IP address does an administrator connect to the iDRAC Direct USB port?
- 169.254.0.3
- 169.254.0.4
- 192.168.1.20
- 192.168.0.20
Correct answer: A
Explanation:
Understanding the iDRAC Direct USB Port and Its Default IP AddressServer Management and Configuration Tools (14%)Define the function of the iDRAC, login procedures, licensing, and connection methodsOverview of iDRAC Direct USB PortThe Integrated Dell Remote Access Controller (iDRAC) provides remote management capabilities for Dell PowerEdge servers. The iDRAC Direct USB port allows administrators to connect directly to the iDRAC interface using a USB cable, facilitating quick and secure server management without needing network access.Default IP Address for iDRAC Direct USB PortWhen an administrator connects to the iDRAC Direct USB port, the connection is assigned a default IP address to establish communication between the server and the management station. The default IP address is crucial for accessing the iDRAC web interface via a browser.The default IP address for the iDRAC Direct USB connection is 169.254.0.3.Explanation of OptionsOption A: 169.254.0.3Correct Answe r: This is the default IP address assigned to the iDRAC Direct USB port for direct management access.Option B: 169.254.0.4Incorrect: This IP address is not the default for the iDRAC Direct USB port.Option C: 192.168.1.20Incorrect: While this is a common private IP address, it is not used by default for iDRAC Direct USB connections.Option D: 192.168.0.20Incorrect: Similar to Option C, this is a private IP address but not associated with the iDRAC Direct USB port.Dell Operate ReferenceServer Management and Configuration Tools (14%): Understanding different connection methods to iDRAC is essential.Define the function of the iDRAC, login procedures, licensing, and connection methods: Knowledge of default IP addresses and connection protocols is crucial for effective server management.ConclusionKnowing the default IP address for the iDRAC Direct USB port allows administrators to establish a direct connection efficiently, ensuring quick access for configuration and troubleshooting tasks. Understanding the iDRAC Direct USB Port and Its Default IP Address
Server Management and Configuration Tools (14%)
Define the function of the iDRAC, login procedures, licensing, and connection methods
Overview of iDRAC Direct USB Port
The Integrated Dell Remote Access Controller (iDRAC) provides remote management capabilities for Dell PowerEdge servers. The iDRAC Direct USB port allows administrators to connect directly to the iDRAC interface using a USB cable, facilitating quick and secure server management without needing network access.
Default IP Address for iDRAC Direct USB Port
When an administrator connects to the iDRAC Direct USB port, the connection is assigned a default IP address to establish communication between the server and the management station. The default IP address is crucial for accessing the iDRAC web interface via a browser.
The default IP address for the iDRAC Direct USB connection is 169.254.0.3.
Explanation of Options
Option A: 169.254.0.3
Correct Answe r: This is the default IP address assigned to the iDRAC Direct USB port for direct management access.
Option B: 169.254.0.4
Incorrect: This IP address is not the default for the iDRAC Direct USB port.
Option C: 192.168.1.20
Incorrect: While this is a common private IP address, it is not used by default for iDRAC Direct USB connections.
Option D: 192.168.0.20
Incorrect: Similar to Option C, this is a private IP address but not associated with the iDRAC Direct USB port.
Dell Operate Reference
Server Management and Configuration Tools (14%): Understanding different connection methods to iDRAC is essential.
Define the function of the iDRAC, login procedures, licensing, and connection methods: Knowledge of default IP addresses and connection protocols is crucial for effective server management.
Conclusion
Knowing the default IP address for the iDRAC Direct USB port allows administrators to establish a direct connection efficiently, ensuring quick access for configuration and troubleshooting tasks.
Question 8
Under which heading can the user locate Lifecycle logs in the iDRAC Ul?
- System
- System event log
- Diagnostics
- Maintenance
Correct answer: D
Explanation:
ocating Lifecycle Logs in the iDRAC UI Server Troubleshooting (32%)Explain the server logs and memory errorUnderstanding Lifecycle LogsThe Lifecycle Controller logs (Lifecycle Logs) are essential for tracking system events related to hardware configuration, firmware updates, and system health. These logs provide valuable information for troubleshooting and auditing purposes.Accessing Lifecycle Logs in iDRAC UIIn the iDRAC web interface, administrators can navigate through various sections to access system information and logs.To locate the Lifecycle Logs:Log into the iDRAC Web Interface using your administrative credentials.Navigate to the 'Maintenance' Tab:This section is dedicated to maintenance tasks and logs.Select 'System Event Log' or 'Lifecycle Log' under the Maintenance section to view the detailed logs.Explanation of OptionsOption A: SystemIncorrect: This section provides system overview and hardware information but does not contain the Lifecycle Logs.Option B: System Event LogIncorrect: While this log contains events, the Lifecycle Logs are specifically found under the Maintenance section.Option C: DiagnosticsIncorrect: This area is used for running diagnostic tests, not for accessing Lifecycle Logs.Option D: MaintenanceCorrect Answe r: The Lifecycle Logs are located under the Maintenance heading in the iDRAC UI.Dell Operate ReferenceServer Troubleshooting (32%): Accessing and interpreting server logs is vital for diagnosing issues.Explain the server logs and memory error: Understanding where logs are stored helps in efficient troubleshooting.Server Management and Configuration Tools (14%): Navigating the iDRAC UI is crucial for system administration tasks.ConclusionBy knowing that the Lifecycle Logs are located under the Maintenance section, administrators can quickly access important system event information necessary for troubleshooting and maintaining server health. ocating Lifecycle Logs in the iDRAC UI
Server Troubleshooting (32%)
Explain the server logs and memory error
Understanding Lifecycle Logs
The Lifecycle Controller logs (Lifecycle Logs) are essential for tracking system events related to hardware configuration, firmware updates, and system health. These logs provide valuable information for troubleshooting and auditing purposes.
Accessing Lifecycle Logs in iDRAC UI
In the iDRAC web interface, administrators can navigate through various sections to access system information and logs.
To locate the Lifecycle Logs:
Log into the iDRAC Web Interface using your administrative credentials.
Navigate to the 'Maintenance' Tab:
This section is dedicated to maintenance tasks and logs.
Select 'System Event Log' or 'Lifecycle Log' under the Maintenance section to view the detailed logs.
Explanation of Options
Option A: System
Incorrect: This section provides system overview and hardware information but does not contain the Lifecycle Logs.
Option B: System Event Log
Incorrect: While this log contains events, the Lifecycle Logs are specifically found under the Maintenance section.
Option C: Diagnostics
Incorrect: This area is used for running diagnostic tests, not for accessing Lifecycle Logs.
Option D: Maintenance
Correct Answe r: The Lifecycle Logs are located under the Maintenance heading in the iDRAC UI.
Dell Operate Reference
Server Troubleshooting (32%): Accessing and interpreting server logs is vital for diagnosing issues.
Explain the server logs and memory error: Understanding where logs are stored helps in efficient troubleshooting.
Server Management and Configuration Tools (14%): Navigating the iDRAC UI is crucial for system administration tasks.
Conclusion
By knowing that the Lifecycle Logs are located under the Maintenance section, administrators can quickly access important system event information necessary for troubleshooting and maintaining server health.
Question 9
A customer acquired six R750 servers. They must add these servers to their existing R760 iDRAC Group but are encountering errors.
What is the reason for the errors?
- R750 iDRACs firmware is out of date.
- R750 iDRACs are not running the same version of firmware.
- 15G and 16G servers cannot be in the same group.
- The feature requires iDRAC Enterprise.
Correct answer: C
Explanation:
Understanding iDRAC Group Management and CompatibilityServer Management and Configuration Tools (14%)Define the function of the iDRAC, login procedures, licensing, and connection methodsExplain the management interface options - LCC, racadm, OMSA, iSM, OMESystem Administration (18%)Configure BIOS, Storage, virtual media, networking, user access, lockdown mode, and group managementScenario AnalysisThe customer has acquired six Dell PowerEdge R750 servers and wants to add them to an existing iDRAC Group that currently contains R760 servers. However, they are encountering errors during this process. Understanding Dell Server GenerationsPowerEdge R750: Part of the 15th Generation (15G) servers.PowerEdge R760: Part of the 16th Generation (16G) servers.iDRAC Group Manager LimitationsiDRAC Group Manager allows administrators to manage multiple servers from a single interface.Important Limitation: Servers of different generations cannot be grouped together in iDRAC Group Manager.This is due to differences in firmware, hardware capabilities, and iDRAC features between server generations.Impact: Attempting to add 15G servers (R750) to a group containing 16G servers (R760) will result in errors.Evaluation of OptionsOption A: R750 iDRACs firmware is out of dateAnalysis: While outdated firmware can cause issues, it is not the primary reason here. Firmware updates would not resolve the incompatibility between different server generations.Option B: R750 iDRACs are not running the same version of firmwareAnalysis: Similar to Option A, firmware version mismatches can cause problems but not errors related to grouping different generations.Option C: 15G and 16G servers cannot be in the same groupCorrect Answe r: This is the primary reason for the errors encountered.Option D: The feature requires iDRAC EnterpriseAnalysis: Since the customer already has an existing iDRAC group with R760 servers, they likely have the necessary licensing.Dell Operate ReferenceServer Management and Configuration Tools (14%)Emphasizes understanding iDRAC functionalities and limitations.System Administration (18%)Highlights the importance of group management and its constraints.ConclusionThe errors occur because iDRAC Group Manager does not support grouping servers from different generations. The customer cannot add 15G servers (R750) to a group that contains 16G servers (R760). Understanding iDRAC Group Management and Compatibility
Server Management and Configuration Tools (14%)
Define the function of the iDRAC, login procedures, licensing, and connection methods
Explain the management interface options - LCC, racadm, OMSA, iSM, OME
System Administration (18%)
Configure BIOS, Storage, virtual media, networking, user access, lockdown mode, and group management
Scenario Analysis
The customer has acquired six Dell PowerEdge R750 servers and wants to add them to an existing iDRAC Group that currently contains R760 servers. However, they are encountering errors during this process.
Understanding Dell Server Generations
PowerEdge R750: Part of the 15th Generation (15G) servers.
PowerEdge R760: Part of the 16th Generation (16G) servers.
iDRAC Group Manager Limitations
iDRAC Group Manager allows administrators to manage multiple servers from a single interface.
Important Limitation: Servers of different generations cannot be grouped together in iDRAC Group Manager.
This is due to differences in firmware, hardware capabilities, and iDRAC features between server generations.
Impact: Attempting to add 15G servers (R750) to a group containing 16G servers (R760) will result in errors.
Evaluation of Options
Option A: R750 iDRACs firmware is out of date
Analysis: While outdated firmware can cause issues, it is not the primary reason here. Firmware updates would not resolve the incompatibility between different server generations.
Option B: R750 iDRACs are not running the same version of firmware
Analysis: Similar to Option A, firmware version mismatches can cause problems but not errors related to grouping different generations.
Option C: 15G and 16G servers cannot be in the same group
Correct Answe r: This is the primary reason for the errors encountered.
Option D: The feature requires iDRAC Enterprise
Analysis: Since the customer already has an existing iDRAC group with R760 servers, they likely have the necessary licensing.
Dell Operate Reference
Server Management and Configuration Tools (14%)
Emphasizes understanding iDRAC functionalities and limitations.
System Administration (18%)
Highlights the importance of group management and its constraints.
Conclusion
The errors occur because iDRAC Group Manager does not support grouping servers from different generations. The customer cannot add 15G servers (R750) to a group that contains 16G servers (R760).
Question 10
A system board has been replaced on a Dell PowerEdge 16G server. What data can Easy Restore recover?
- Service Tag
- HBA configuration
- PERC configuration
- Lifecycle controller log
Correct answer: A
Explanation:
Understanding Easy Restore FunctionalityServer Troubleshooting (32%)Explain Easy Restore, diagnostic utilities, and hardware diagnostic optionsWhat is Easy Restore?Easy Restore is a feature in Dell PowerEdge servers that automatically restores system-specific information after a system board replacement.Purpose: Minimizes downtime and simplifies recovery by retaining critical system identity information.Data Restored by Easy RestoreService Tag: The unique identifier (serial number) of the server.System Configuration Settings: Includes BIOS settings and other non-volatile configurations.Data NOT Restored by Easy RestoreOption B: HBA ConfigurationHost Bus Adapter settings are not restored automatically.Option C: PERC Configuration RAID configurations need to be backed up and restored separately.Option D: Lifecycle Controller LogLogs are stored on the system board and do not transfer after replacement.Evaluation of OptionsOption A: Service TagCorrect Answe r: Easy Restore recovers the Service Tag, preserving the server's identity.Option B: HBA ConfigurationAnalysis: Requires manual configuration or restoration from a backup.Option C: PERC ConfigurationAnalysis: RAID settings are critical but need separate backup and restoration procedures.Option D: Lifecycle Controller LogAnalysis: Logs are not preserved after system board replacement.Dell Operate ReferenceServer Troubleshooting (32%)Highlights the importance of understanding what Easy Restore can and cannot recover.ConclusionAfter replacing the system board on a Dell PowerEdge 16G server, Easy Restore will recover the Service Tag, ensuring the server maintains its unique identity within the network and management systems. Understanding Easy Restore Functionality
Server Troubleshooting (32%)
Explain Easy Restore, diagnostic utilities, and hardware diagnostic options
What is Easy Restore?
Easy Restore is a feature in Dell PowerEdge servers that automatically restores system-specific information after a system board replacement.
Purpose: Minimizes downtime and simplifies recovery by retaining critical system identity information.
Data Restored by Easy Restore
Service Tag: The unique identifier (serial number) of the server.
System Configuration Settings: Includes BIOS settings and other non-volatile configurations.
Data NOT Restored by Easy Restore
Option B: HBA Configuration
Host Bus Adapter settings are not restored automatically.
Option C: PERC Configuration
RAID configurations need to be backed up and restored separately.
Option D: Lifecycle Controller Log
Logs are stored on the system board and do not transfer after replacement.
Evaluation of Options
Option A: Service Tag
Correct Answe r: Easy Restore recovers the Service Tag, preserving the server's identity.
Option B: HBA Configuration
Analysis: Requires manual configuration or restoration from a backup.
Option C: PERC Configuration
Analysis: RAID settings are critical but need separate backup and restoration procedures.
Option D: Lifecycle Controller Log
Analysis: Logs are not preserved after system board replacement.
Dell Operate Reference
Server Troubleshooting (32%)
Highlights the importance of understanding what Easy Restore can and cannot recover.
Conclusion
After replacing the system board on a Dell PowerEdge 16G server, Easy Restore will recover the Service Tag, ensuring the server maintains its unique identity within the network and management systems.
Question 11
Exhibit.

What does the black strap on the power supply handle specify?
- PSU
- NAF
- RAF
- Spare PSU
Correct answer: B
Explanation:
Understanding the Black Strap on the Power Supply HandleServer Components (26%)Identify power options and redundancy features, thermal features, and liquid cooling of Power Supply StrapsDell PowerEdge servers often use black straps on power supply units (PSUs) to indicate certain attributes of the PSU. The color of the strap can help identify specific features or categories of the power supply. What Does 'NAF' Mean?NAF stands for Non-Redundant, Auto Failover.This indicates that the PSU is part of a non-redundant configuration, but it is capable of automatic failover in the case of power loss.This is typical in systems with multiple PSUs, where each PSU can take over if the other fails.Why Not Other Options?Option A: PSUThe strap does not indicate that the device is just a PSU; rather, it indicates a specific feature of the PSU.Option C: RAFRAF stands for Redundant Auto Failover, which is not the correct feature indicated by the black strap.Option D: Spare PSUThe strap does not indicate that the PSU is a spare unit.ConclusionThe black strap on the power supply handle indicates that the PSU is NAF (Non-Redundant, Auto Failover). This means it is part of a non-redundant system but capable of automatic failover. Understanding the Black Strap on the Power Supply Handle
Server Components (26%)
Identify power options and redundancy features, thermal features, and liquid cooling
of Power Supply Straps
Dell PowerEdge servers often use black straps on power supply units (PSUs) to indicate certain attributes of the PSU. The color of the strap can help identify specific features or categories of the power supply.
What Does 'NAF' Mean?
NAF stands for Non-Redundant, Auto Failover.
This indicates that the PSU is part of a non-redundant configuration, but it is capable of automatic failover in the case of power loss.
This is typical in systems with multiple PSUs, where each PSU can take over if the other fails.
Why Not Other Options?
Option A: PSU
The strap does not indicate that the device is just a PSU; rather, it indicates a specific feature of the PSU.
Option C: RAF
RAF stands for Redundant Auto Failover, which is not the correct feature indicated by the black strap.
Option D: Spare PSU
The strap does not indicate that the PSU is a spare unit.
Conclusion
The black strap on the power supply handle indicates that the PSU is NAF (Non-Redundant, Auto Failover). This means it is part of a non-redundant system but capable of automatic failover.
HOW TO OPEN VCE FILES
Use VCE Exam Simulator to open VCE files
HOW TO OPEN VCEX AND EXAM FILES
Use ProfExam Simulator to open VCEX and EXAM files
ProfExam at a 20% markdown
You have the opportunity to purchase ProfExam at a 20% reduced price
Get Now!